transitioning a complete Interim Denture to a Definitive Bar-Retained Overdenture is a heavy task. Why? Because you are required to transfer two extremely important things at the same time:
-
Implant positioning with microscopic precision to ensure Passive Fit (this is the soul of implants; without it, the screw loosens or the implant suffers Bone Loss).
-
The patient’s bite and tooth appearance (Occlusion & Esthetics) that we adjusted in the interim denture and the patient got used to.
Traditional methods consume a lot of time and appointments (Jigs, try-ins, and a long story). Fully digital methods still face challenges in capturing Soft Tissue details accurately.
Today, I’m bringing you the “bottom line” from a new research paper (Espona et al., 2026) that presents a Hybrid Protocol solving this dilemma very intelligently.
1. The Idea Simply: What is this Hybrid Workflow?
The idea is based on using digital technology (Scanners & 3D Printing) to create an exact replica of the interim denture, but this replica is “customized” to work as an Impression Tray and a Bite Registration at the same time.
Meaning, we kill two birds with one stone: we take the implant impression accurately (Pick-up technique), and we transfer the occlusion and tooth shape in the same step.
2. The Practical Steps (Step-by-Step Protocol):
Focus with me, Doctor, on these steps, because the sequence here is the secret to success:
A. Preparing the Interim Denture (The Reference):
First, we must ensure the patient’s current interim denture is “perfect.” The occlusion is correct, the Vertical Dimension is spot on, and the patient likes the look.
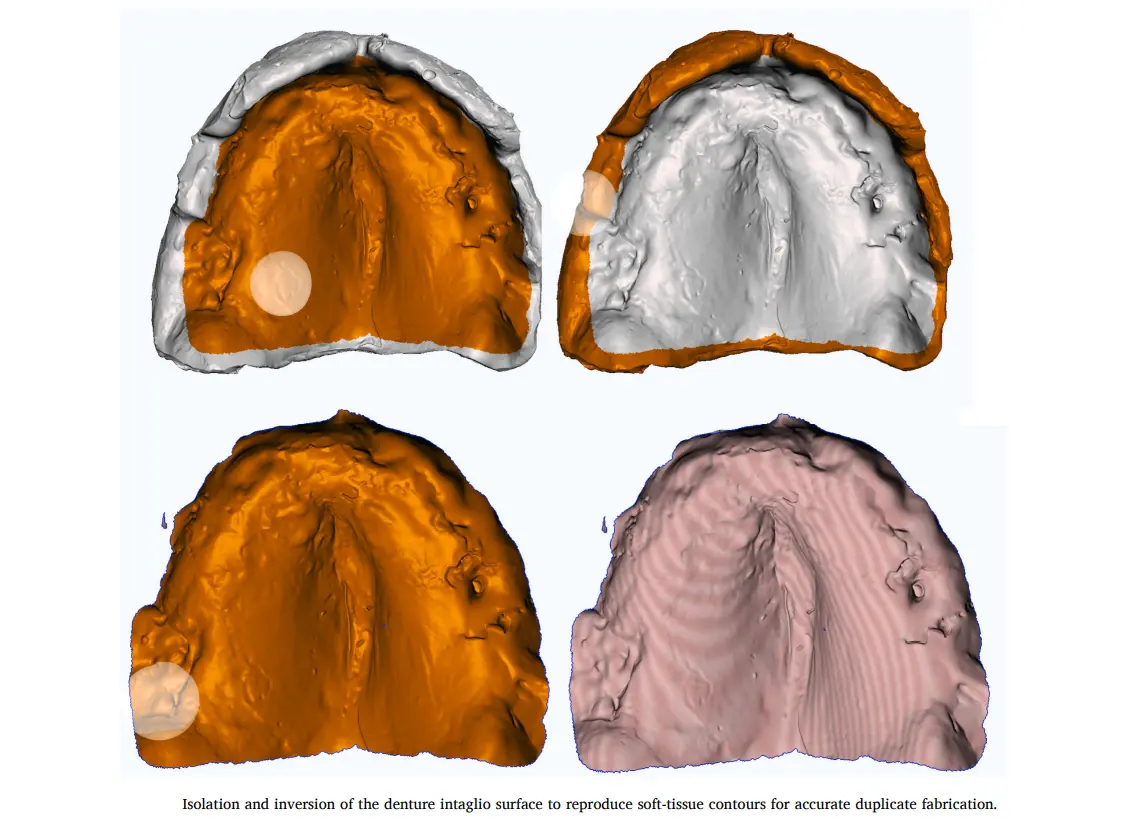
Important Point: We perform a Functional Relining of this denture using Light PVS to copy the tissue shape (Intaglio Surface) with 100% accuracy.
B. The Scanning Stage (Scanning Strategy):
Here comes the digital role. We will scan two things:
-
The Relined Denture: We do an Extraoral Scan of it from the outside and inside (360 degrees).
-
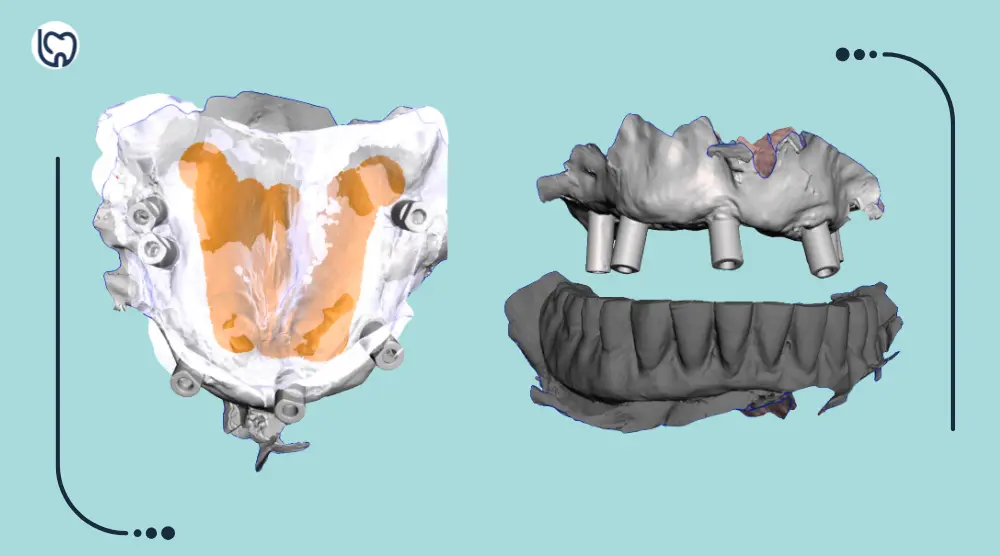
The Patient’s Mouth: We install the Scan Bodies on the implants and perform an Intraoral Scan.

(Image of the Maxillary Intraoral scan showing the Scan bodies)
This is the step where we record the implant positions digitally. Notice how clear the Scan bodies are.
C. The Magic in the Software (Digital Alignment & Design):
Here is where the real “play” happens. We upload these files to any CAD software (the researchers used MeshMixer as an open-source solution, but you can use Exocad or 3Shape).
We perform Alignment between the mouth scan and the denture scan. We use Palate landmarks (like the Rugae) to superimpose them accurately.
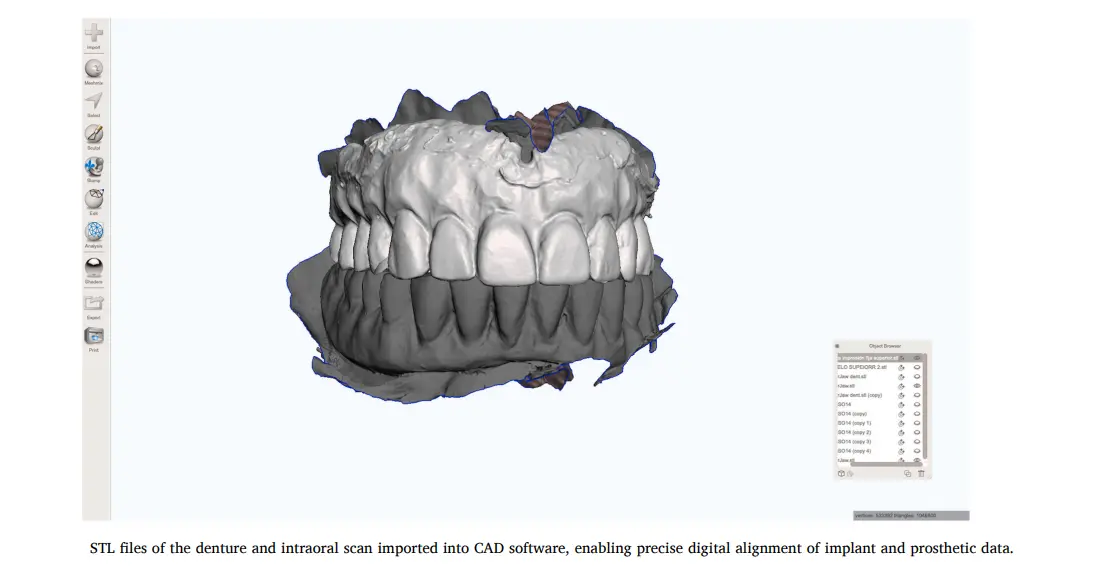
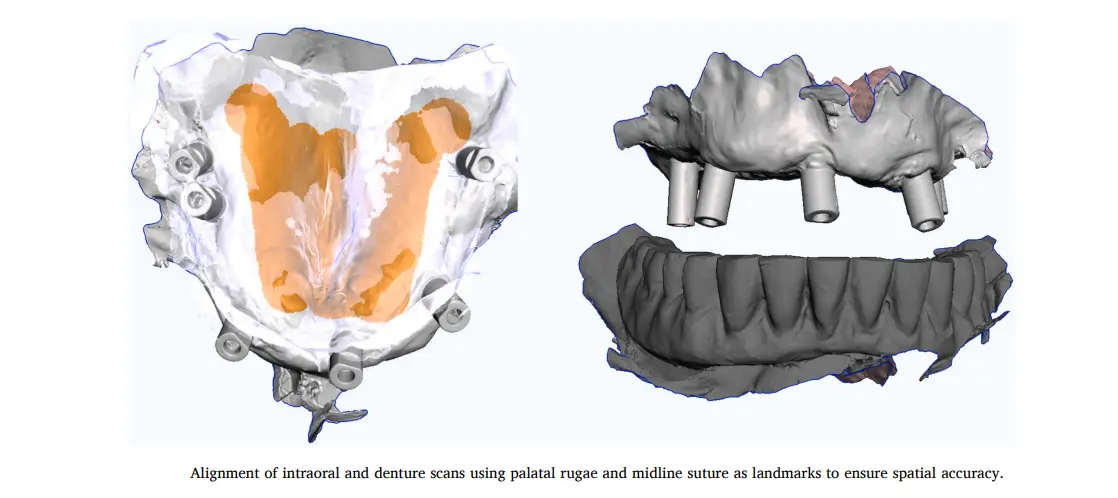
(Images showing the Alignment process inside the software)
Notice the matching of the Rugae Palatinae; this guarantees the digital denture is sitting in the correct position relative to the implants.
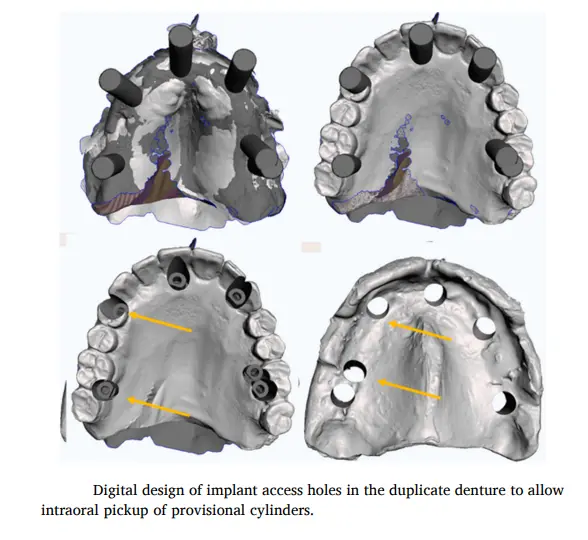
Designing “The Duplicate”: We design a copy of the denture, but we add small “tricks”:
-
We create clearance holes over the implant sites so the Abutments pass through comfortably.
-
We create lateral Injection Channels. Why? So we can inject the material that will hold the Cylinder through them.
![]()
(Images showing the design of holes and injection channels in the software)
These channels are the secret that allows us to inject the Resin while the patient’s mouth is closed.
D. Printing and Processing (3D Printing):
We print this denture using Clear Biocompatible Resin. Transparency here is very important so we can visualize our seating well.
E. The Critical Step: The Clinical Pick-up:
This is the moment we turn digital into tangible reality (Analog):
-
Screw the Titanium Provisional Cylinders onto the implants in the patient’s mouth.
-
Insert the transparent printed denture (it will fit comfortably because we cleared space for the implants).
-
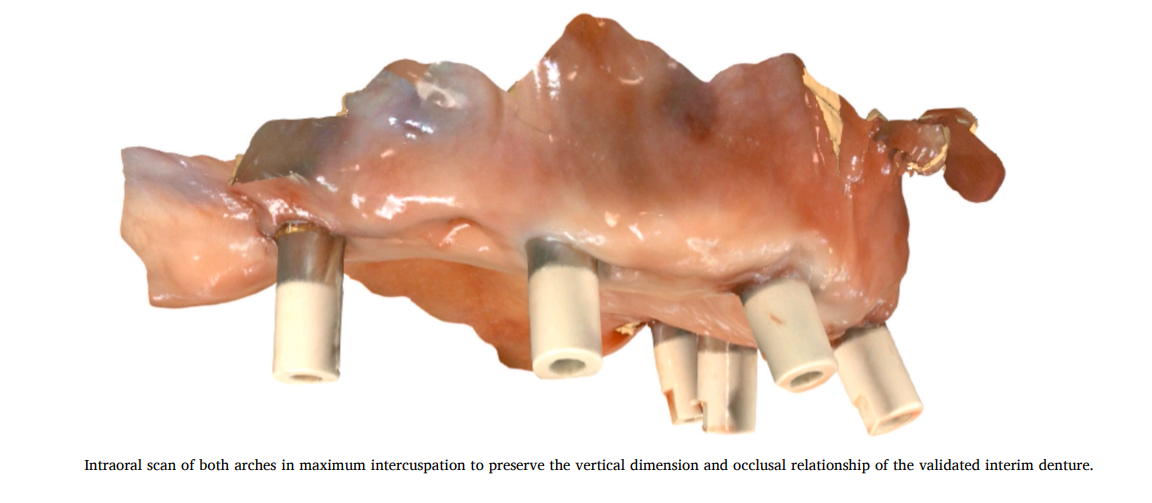
Ask the patient to bite (Maximum Intercuspation). Now we have secured the occlusion and VDO.
-
While the patient is biting, inject Flowable Composite or Resin through the lateral channels we made to bond the Cylinders to the denture body.
-
After it cures, unscrew the screws and remove the whole denture as one piece.
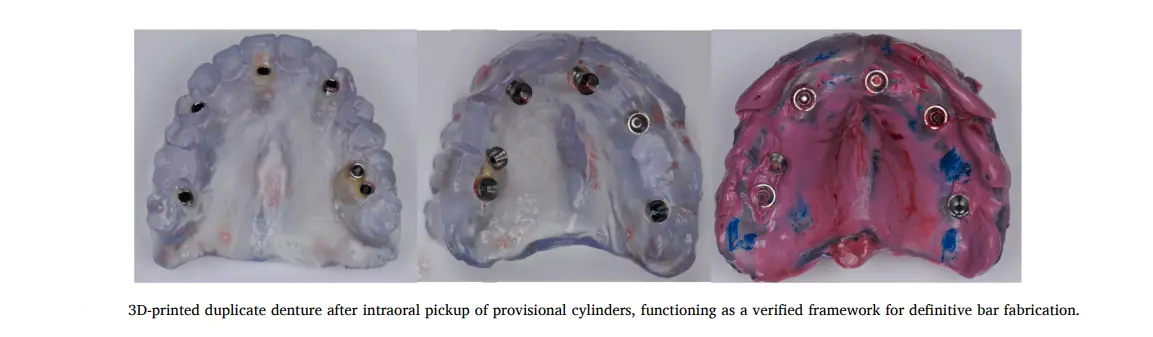
(The denture after removal containing the Cylinders)
Now you have a final Jig that holds the exact implant positions (Passive Fit), along with the tooth form and occlusion. Send it to the lab and order the Bar while you relax.
3. Why is this method a “Pro Move”? (The Advantages)
-
Accuracy & Passive Fit: Because we bonded the Cylinders inside the patient’s mouth (Intraoral Pick-up), we eliminated any distortion that might happen during printing or scanning. This is the most accurate method known to date.
-
Saving Time: The whole process is done in one session (about 90 minutes). You saved yourself and the patient back-and-forth trips.
-
Patient Comfort: The patient didn’t leave your clinic without teeth. They still have their intact interim denture, and we worked with the printed copy.
-
Cost: You don’t need expensive high-tech labs. Any simple 3D Printer and free or cheap software can do this job.
4. The Challenges (Limitations & Takeaway)
To be scientifically honest as we agreed:
-
This method relies entirely on the interim denture being correct. If the interim is bad, the copy will be bad (Garbage in, Garbage out).
-
It requires some CAD Skills to adjust the Alignment and create the holes.
-
The paper used MeshMixer, which is discontinued, but the principle is the same and can be applied with Exocad or Blender for Dental.
The Bottom Line, Doctor:
This protocol is the magic solution for Bar-Retained Overdenture cases. Instead of separating the impression steps from the occlusion steps and getting lost in between, merge them together.
Use Digital to create a “Carrier,” and use Analog (Pick-up) to guarantee accuracy. This is the “Craftsmanship” that distinguishes a doctor who understands and keeps up, from a doctor still working with tiring old methods.
Try this method in your next case, and let us know!